
Yes, you can turn off Facebook Reviews (Recommendations) on your business Page in a few clicks. Doing so hides every existing review and removes your star rating immediately, though nothing gets deleted. The setting lives in different spots depending on whether you’re using a classic Page layout or the newer Pages experience, and step-by-step instructions for both follow below.
TL;DR:
- Disabling Facebook reviews hides existing reviews and star ratings but does not delete the past feedback or testimonials.
- The review toggle location varies between classic and new Pages experience, with an emphasis on Settings and Privacy sections.
- Responding promptly to negative reviews, instead of disabling reviews altogether, helps manage reputation without losing social proof.
- Disabling reviews can be appropriate during coordinated spam attacks, harassment, or short-term PR crises, but it risks losing positive feedback.
- Reviews reappear in full once re-enabled, allowing businesses to rebuild their star rating and gather new reviews to offset past negativity.
Table of Contents
- How to Turn Off Facebook Reviews on Classic Pages
- How to Disable Reviews on the New Pages Experience
- Should You Just Respond Instead of Turning Reviews Off?
- What You Give Up When You Disable Reviews
- What Happens After You Turn Off Reviews (And How to Bring Them Back)
- Quick Checklist for Handling a Review Spike
- When a Review Problem Needs More Than a Quick Fix
- How Ibrandmedia Helps Rebuild Your Facebook Reputation
- Sources
- FAQ
How to Turn Off Facebook Reviews on Classic Pages
If your Page still uses the older Templates and Tabs layout, the toggle sits inside your Settings menu. Facebook’s own help documentation confirms that turning Recommendations off hides the reviews and removes the star rating from public view.
Here’s how to disable it:
- Log in to Facebook as an admin and open your business Page.
- Click Settings in the left sidebar (or top menu, depending on your view).
- Select Templates and Tabs.
- Scroll to find the Reviews tab, listed as Recommendations on some Pages.
- Toggle the switch to Off.
- Confirm the change saves, then visit your Page as a regular visitor to check the tab is gone.
This method matches the process outlined by Hearsay Social’s guide to Facebook Page reviews. If you don’t see a Reviews tab at all, check your Page category first. Some business types, like certain service or brand Pages, never had Reviews enabled to begin with.
How to Disable Reviews on the New Pages Experience
Facebook has been shifting business Pages toward a professional dashboard layout, and the review toggle moved along with it. The location isn’t always in the same spot the old layout trained you to expect.
Try this sequence:
- Open your Page and click into the Professional dashboard.
- Go to Settings, then look under Privacy or Page and tagging.
- Find Reviews or Recommendations and switch it Off.
- Refresh your Page’s public view to confirm reviews and the star rating are gone.
- If you can’t locate the toggle, use the search bar inside Settings and type “reviews” or “recommendations.”
Labels shift as Facebook rolls out interface updates, so don’t panic if the wording on your screen doesn’t match exactly what’s described here. The setting exists somewhere in Settings even when the name changes.
Should You Just Respond Instead of Turning Reviews Off?
Disabling reviews is a blunt instrument. Before you flip that switch, consider the tools built for handling a bad review without losing your entire rating system.
Page owners cannot delete an individual review, no matter how unfair it feels. What you can do is respond to it, report it, or ask the reviewer to update it:
- Report reviews that violate Facebook’s Community Standards using the three-dot menu next to the review, then select “Find support or report.”
- Respond publicly with a short, factual reply: acknowledge the complaint, correct any inaccuracies, and invite the person to resolve things offline.
- Reach out privately once the issue is fixed and politely ask if they’d update or remove the review.
- Escalate to Facebook support, or in rare cases involving defamation, consult a lawyer.
Pro Tip: Reply to negative reviews within 24 hours. A fast, calm response often matters more to future customers reading the thread than the original complaint does. A response template with the right tone and timing can save you from writing one from scratch every time.
What You Give Up When You Disable Reviews
Turning off Reviews doesn’t just hide the bad ones. It wipes out your star rating and every positive testimonial your happiest customers left too.
That’s a real trade-off, and reputation specialists generally treat this as a last resort rather than a first move. Fair scenarios for disabling include:
- A coordinated spam attack, often marked by identical text, repeat IP patterns, or a batch of brand-new accounts posting within hours of each other.
- A genuine safety threat tied to reviews (harassment, doxxing, threats).
- A short-term PR crisis where you need breathing room to respond before reopening the feature.
If you do disable it, screenshot every review first, brief your staff on what’s happening, and set a date to revisit the decision. Removing social proof to dodge one bad week can cost you more in customer trust than the bad reviews did.
What Happens After You Turn Off Reviews (And How to Bring Them Back)
Hidden is not the same as gone. Facebook stores your Page’s review history even when the tab disappears, and reviews return in full once you re-enable the feature, star rating included.
To bring reviews back:
- Go back to the same Settings path you used to disable them (Templates and Tabs or Privacy, depending on your layout).
- Toggle Reviews or Recommendations back to On.
- Check your public Page to confirm the tab and star rating reappear.
Once reviews are visible again, ask a handful of satisfied customers to leave fresh ones. A steady trickle of new reviews dilutes the sting of old complaints faster than waiting for time to pass on its own.
Quick Checklist for Handling a Review Spike
When reviews start piling up fast, work through this in order:
- Screenshot every suspicious or abusive review before it disappears or gets edited.
- Report any post that breaks Facebook’s Community Standards.
- Brief your staff so nobody responds publicly with mixed messaging.
- Decide: is this a short-term hide or a case for permanent removal review?
- After the dust settles, monitor daily for a week and request updated reviews from customers you’ve already resolved issues with.
Pro Tip: Keep a saved response template ready before a crisis hits. Scrambling to write a calm, professional reply while reviews are flooding in almost always produces a worse response than one drafted with a clear head.
When a Review Problem Needs More Than a Quick Fix
Most review spikes get resolved with a fast report and a well written reply. But recurring attacks, or reviews that keep resurfacing across multiple platforms, usually point to a deeper reputation gap that a single afternoon of damage control won’t close.
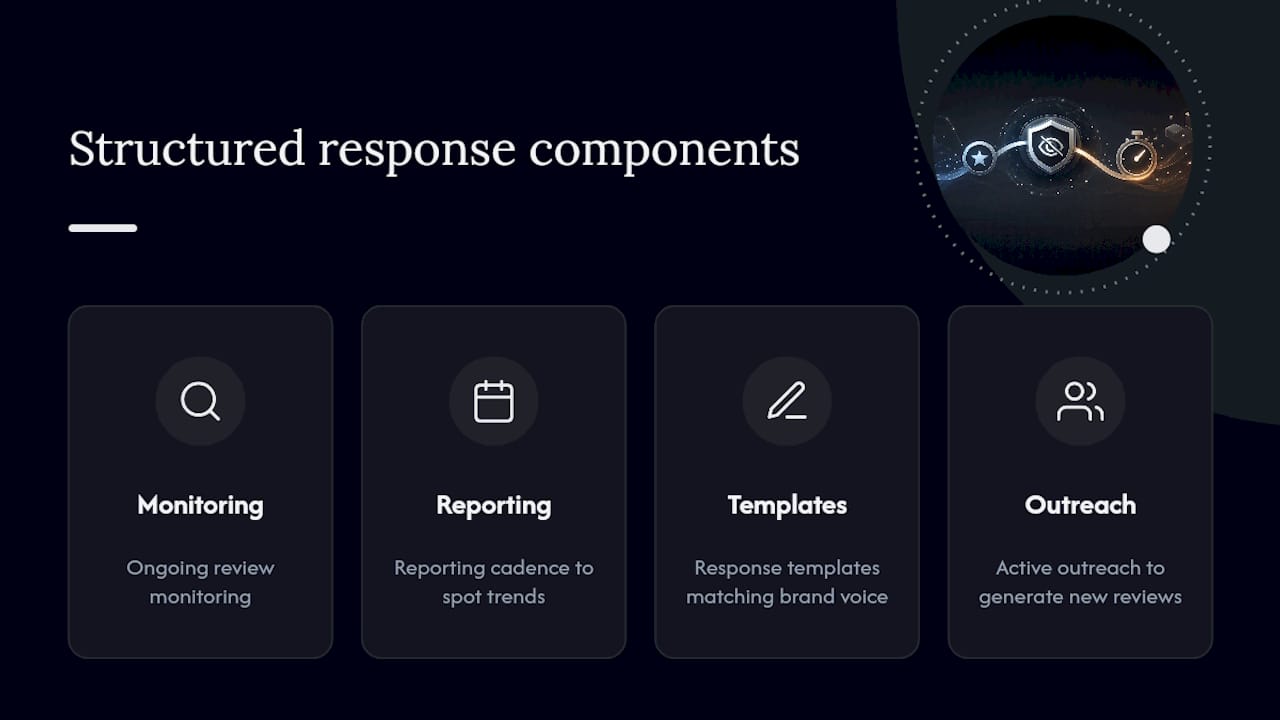
That’s when a structured monitoring and response system, the kind documented in reputation management practice, earns its keep. A real engagement typically covers ongoing review monitoring, a reporting cadence so you know what’s happening before it snowballs, response templates matched to your brand’s voice, and active outreach to turn satisfied customers into new reviews. Handle it in house if you have the bandwidth and a consistent process. Bring in outside help when the reviews keep coming faster than your team can respond to them.
— TONY
How Ibrandmedia Helps Rebuild Your Facebook Reputation
Hiring an agency for every bad review is overkill. But when review spam turns into a pattern, or your star rating takes a hit you can’t recover from with a few polite replies, that’s a different problem than a Saturday-afternoon fix.

Ibrand works with small businesses on exactly this kind of reputation recovery, pairing social media management with dedicated reputation monitoring so problem reviews get flagged and answered before they pile up. That includes tracking mentions across your Page, drafting response templates matched to your tone, and running the kind of steady review acquisition that rebuilds a star rating faster than waiting it out. If your local marketing already needs a boost alongside your review strategy, that’s part of the same conversation. Check out the social media management services page and request a custom plan to see what a monitoring and response system would look like for your Page.
Sources
- Turn Recommendations on or off for your business Page — Facebook Help
- Turning Ratings and Reviews on/off for Facebook Business Pages — Hearsay Social
- How to delete and remove reviews on Facebook — NewReputation Help Center
- When to turn off Facebook reviews — HubSpot blog
FAQ
How Do I Turn Off Reviews on Facebook?
Go to your Page’s Settings, find Templates and Tabs (classic layout) or Privacy settings (new Pages experience), and toggle Reviews or Recommendations to Off. The change hides your reviews and star rating within minutes.
Can I Hide Facebook Marketplace Reviews?
Marketplace reviews run on a separate rating system tied to your buyer or seller account rather than your business Page’s Reviews tab, so the Page level toggle described here doesn’t affect them. Marketplace doesn’t currently offer a direct option to hide those ratings.
Can People See My Reviews on Facebook?
Yes, by default any visitor to your Page can see your Reviews tab, star rating, and individual recommendations unless you’ve disabled the feature in Settings.
How Do I Get Facebook to Remove a Bad Review?
You cannot delete an individual review as a Page owner. Your options are reporting it if it violates Facebook’s Community Standards, responding publicly, or asking the reviewer directly to update or remove their post.
Will My Old Reviews Come Back if I Re-Enable the Feature?
Yes. Reviews are hidden, not deleted, when you disable the feature, and they reappear along with your star rating as soon as you switch Reviews back on.
Recent Comments